 |
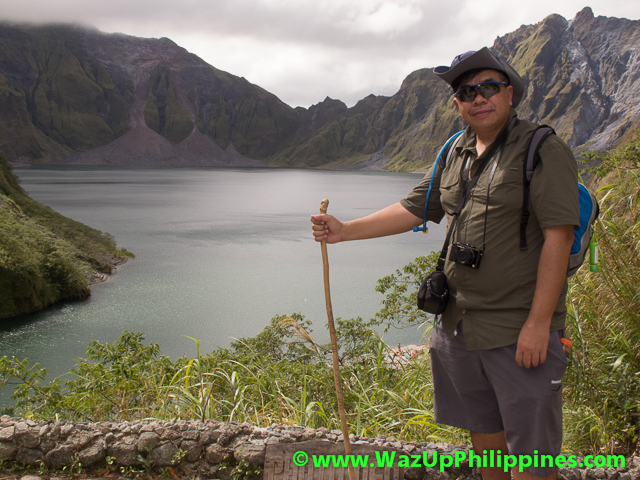
| Yours truly, Ted Claudio at the crater lake of Mount Pinatubo |
People love to travel and take photos to show friends and family about their holidays and travels. In the age of Facebook, Twitpics, Instagrams and other social media photo sharing platforms, it is so easy and fun to share your travel memoirs.
This is first of the “How to Shoot Better Travel Photos” Tutorial Series. A series of posts that will teach you on how to get great photos worth keeping and sharing.
TIP # 1 – Use Flash When Photographing People with Scenic Background
Use flash when photographing people with a scenic backdrop, whether your built-in flash or external flash. In photography parlance, it is called fill-in flash when you use flash as an additional light source in addition to the sunlight, the main light source. You must be wondering, why would I require to use flash in broad daylight? It’s bright and sunny and there is enough light for the subject!
Here are the reasons why using flash can improve your travel photos:
1. Reduce the contrast between subject and background
The contrast between the subject (person) and the background (scenery) could be to much. If you expose based on the background, the person will be underexposed. If you bias towards the person, the scenery might be overexpose. The flash will even out the difference.
2. To fill-in the dark areas not hit by the sun like the face if wearing a hat
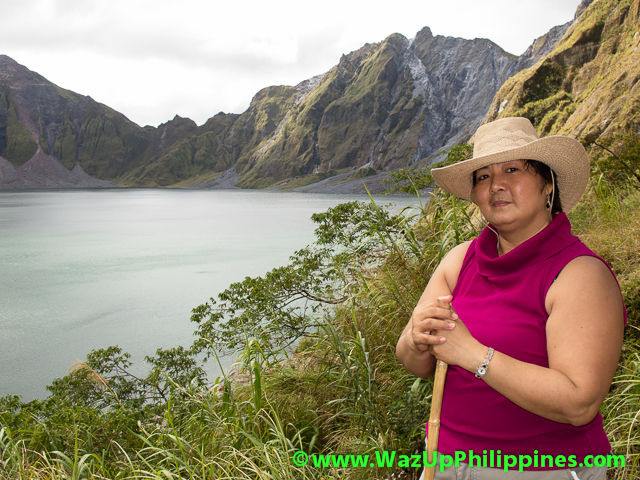 |
| Face and neck well lit even if the person is wearing a hat |
You must have seen a lot of photos of people wearing hats and their face are not properly lit, right? It is because the hat is covering the face from the sun which is the reason why you wear the hat in the first place! Using flash will lit up the covered area of the face including the neck.
3. Add a catch-lights in the eyes
If you use flash, it is reflected in the eyes of the person looking into the camera where the flash is attached. This makes people’s eyes look brighter and livelier like you see in the movies or professional portraits.
A word of caution though, if people are wearing sunglasses it gets reflected as well. You can ask the person to remove the glasses or instruct them to look a bit to the side or down. Avoid shooting straight on to avoid reflections from glasses. Shoot at an angle where the flash lighting won’t bounce back to the camera.
These 3 are the reasons why it is useful to utilize your flash in travel photography.
You can also increase or decrease the flash exposure if your camera has flash exposure compensation (FEC). If your camera has this function use it. All DSLRs have FEC.
Compensate on the + (plus) side like +1 to make the flash exposure on the people brighter or on the – (minus) side to make it darker. Using FEC adjustments affects only the flash exposure. It will not affect the ambient exposure of the scenery/background since the flash is not strong enough to reach the background. Only the ones hit by the flash will become brighter or darker. Adjust according to your preference but don’t make the flash to strong that it overwhelms the daylight as the main source so that your photos will look more natural unless you want to make it as an effect.
For compacts that does not have FEC, you can increase or decrease the flash exposure by going closer or further to the people.
Follow the rest of the “How to Shoot Better Travel Photos” Tutorial Series in this blog. Enjoy traveling and shoot a lot of great photos using this tip!

